从零开始搭建博客网站(四):更好的黑暗模式。
更好的黑暗模式
怎么个事
在 这个系列的第二篇文章 中,我们已经实现了尊重用户偏好模式的同时,支持手动切换的黑暗模式功能。进行手动切换的按钮是一个很简单的按钮,没有什么特殊的样式。一般情况下,我们可能会希望这个按钮在黑暗模式开启或关闭时是不同的样式,比如一个太阳和一个月亮。
在这篇文章中,我们将实现首先这个功能。
复习
看一下,现在我们的 PageNav.vue 文件中有以下内容:
<script setup lang="ts">
const switchDarkMode = (): void => {
  const htmlEl: HTMLElement | null = document.querySelector("html");
  htmlEl?.classList.toggle("dark");
};
</script>

<template>
  <nav class="flex justify-between p-4">
    <a
      class="text-blue-500 hover:underline"
      href="/"
      >Home</a
    >
    <div
      class="dark-mode-switcher w-20 bg-neutral-300 text-center text-neutral-700 dark:bg-neutral-700 dark:text-neutral-300"
      @click="switchDarkMode"
    >
      Switch
    </div>
  </nav>
</template>
可以看到,我们使用一个 switchDarkMode() 函数来切换黑暗模式。它做的工作很简单——在 <html> 元素上切换 dark 类。
响应式状态
要实现在黑暗模式下不同按钮状态,我们需要一个响应式状态:
<script setup lang="ts">
import { onMounted, ref, triggerRef } from "vue";
const htmlEl: HTMLElement | null = document.querySelector("html");
let darkMode = ref({
get state(): boolean {
return htmlEl.classList.contains("dark"); },
set state(value: boolean) {
toggleDarkClass(value);
},
});
const toggleDarkClass = (value: boolean) => {
console.log("Toggle Dark Class " + value);
if (value) {
htmlEl.classList.add("dark"); } else {
htmlEl.classList.remove("dark"); }
};
</script>
<template>
<!-- ... -->
</template><script setup>
import { onMounted, ref, triggerRef } from "vue";
const htmlEl = document.querySelector("html");
let darkMode = ref({
get state() {
return htmlEl.classList.contains("dark");
},
set state(value) {
if (value) {
htmlEl.classList.add("dark");
} else {
htmlEl.classList.remove("dark");
}
},
});
const toggleDarkClass = (value) => {
if (value) {
htmlEl.classList.add("dark");
} else {
htmlEl.classList.remove("dark");
}
};
</script>
<template>
<!-- ... -->
</template>我们在 setup 函数中定义了一个 darkMode 变量,包含名为 state 的 getter 和 setter,用于获取和设置黑暗模式的状态;同时定义有 toggleDarkClass() 函数来进行实际的 DOM 操作,即在 <html> 元素上切换 dark 类。
如果您使用 JS,可以直接跳过至 模板中的处理。
从这里开始,我们会对 TypeScript 有更深入的了解。可以看到,上面的代码抛出了错误:'htmlEl' is possibly 'null'.,这是因为 document.querySelector("html") 可能返回 null。我们有多种方式可以解决这个问题。
类型断言|Type Asertion
有些时候,TypeScript 得出的类型并非我们所期望的。在上面这个例子中,document.querySelector("html") 返回的类型是 Element | null,而我们希望 htmlEl 的类型一定是 HTMLElement。我们可以使用类型断言来解决这个问题:
<script setup lang="ts">
// ...


const htmlEl = document.querySelector("html") as HTMLElement;
// 也可以使用下面的形式,等价:
// const htmlEl = <HTMLElement>document.querySelector("html");

// ...
</script>

<template>
  <!-- ... -->
</template>
我们断言 htmlEl 一定是 HTMLElement,这样就可以避免报错。需要注意的是,类型断言并不会改变 htmlEl 实际的类型,它只是告诉 TypeScript 我们确定 htmlEl 一定是 HTMLElement,但我们的确定不一定是对的 😅 ,所以使用类型断言时要谨慎。
非空断言|Non-null Assertion
在这个特殊的例子中,因为我们需要「去除」的另一个类型是 null。我们可以使用非空断言来解决这个问题:
<script setup lang="ts">
// ...


const htmlEl = document.querySelector("html")!;

// ...
</script>

<template>
  <!-- ... -->
</template>
和上一个方法类似,我们断言 htmlEl 一定非空。需要注意的是——同样地——这并不会改变 htmlEl 实际的类型。
可选链|Optional Chaining
可选链用于处理可能为 null 或 undefined 的值。在 TypeScript 以及 JavaScript 中,对于 a.b 这样的调用,如果 a 为 null 或 undefined,则会抛出错误 Cannot read properties of null (reading 'b') / Cannot read properties of undefined (reading 'b')。使用形如 a?.b 的可选链可以避免这种情况,在 a 为 null 或 undefined 时直接返回 undefined:
<script setup lang="ts">
import { onMounted, ref, triggerRef } from "vue";
const htmlEl: HTMLElement | null = document.querySelector("html");
let darkMode = ref({
get state(): boolean {
return htmlEl?.classList.contains("dark"); },
set state(value: boolean) {
toggleDarkClass(value);
},
});
const toggleDarkClass = (value: boolean) => {
console.log("Toggle Dark Class " + value);
if (value) {
htmlEl?.classList.add("dark");
} else {
htmlEl?.classList.remove("dark");
}
};
</script>
<template>
<!-- ... -->
</template>所以如你所见,使用可选链会导致另一个问题:darkMode 的 getter 函数的返回值类型实际上是 boolean | undefined,但我们希望它是 boolean,虽然可以加入新的验证逻辑去解决,但无疑会增加代码的复杂度。
单独验证
另一种解决方案是单独验证 htmlEl 是否为 null 或 undefined:如果是,则提前抛出错误:
<script setup lang="ts">
import { onMounted, ref, triggerRef } from "vue";

const htmlEl: HTMLElement | null = document.querySelector("html");

if (!htmlEl) {
  throw new Error("HTML element not found");
}

let darkMode = ref({
  get state(): boolean {
    return htmlEl.classList.contains("dark");
  },

  set state(value: boolean) {
    toggleDarkClass(value);
  },
});

const toggleDarkClass = (value: boolean) => {
  console.log("Toggle Dark Class " + value);

  if (value) {
    htmlEl.classList.add("dark");
  } else {
    htmlEl.classList.remove("dark");
  }
};
</script>

<template>
  <!-- ... -->
</template>
可以看到,虽然 htmlEl 的类型在定义时确实是 HTMLElement | null,但在检查并抛出错误之后,其类型就只剩下了 HTMLElement。
这里我们使用最后一种方式来处理。
模板中的处理
有了 darkMode 这个状态和 toggleDarkClass() 函数,我们就可以在模板中实现下面的操作:(顺便设计一下排版和样式)
<script setup lang="ts">
// ...
</script>

<template>
  <nav class="flex flex-row justify-between p-4">
    <div class="m-2">
      <a
        class="font-[noteworthy] text-5xl text-neutral-800 dark:text-neutral-200"
        href="/"
        >HOME</a
      >
    </div>
    <div class="flex flex-row items-center gap-6 text-xl">
      <a
        class="m-1 flex h-6 w-6 cursor-pointer items-center justify-center text-neutral-500 transition-colors duration-200 hover:text-neutral-700 dark:hover:text-neutral-300"
        href="https://github.com/"
      >
        <svg
          xmlns="http://www.w3.org/2000/svg"
          width="1em"
          height="1em"
          viewBox="0 0 24 24"
        >
          <g
            fill="none"
            stroke="currentColor"
            stroke-linecap="round"
            stroke-linejoin="round"
            stroke-width="1.5"
          >
            <path d="M12 22c5.523 0 10-4.477 10-10S17.523 2 12 2S2 6.477 2 12s4.477 10 10 10" />
            <path
              d="M14.333 19v-1.863c.025-.31-.018-.62-.126-.913a2.2 2.2 0 0 0-.5-.781c2.093-.227 4.293-1 4.293-4.544a3.48 3.48 0 0 0-1-2.434a3.2 3.2 0 0 0-.06-2.448s-.787-.227-2.607.961a9.15 9.15 0 0 0-4.666 0c-1.82-1.188-2.607-.96-2.607-.96A3.2 3.2 0 0 0 7 8.464a3.48 3.48 0 0 0-1 2.453c0 3.519 2.2 4.291 4.293 4.544a2.2 2.2 0 0 0-.496.773a2.1 2.1 0 0 0-.13.902V19"
            />
            <path d="M9.667 17.702c-2 .631-3.667 0-4.667-1.948" />
          </g>
        </svg>
      </a>
      <div
        class="m-1 flex h-6 w-6 cursor-pointer items-center justify-center text-neutral-500 transition-colors duration-200 hover:text-neutral-700 dark:hover:text-neutral-300"
        @click="darkMode.state = htmlEl.classList.contains('dark') ? false : true"
      >
        <svg
          xmlns="http://www.w3.org/2000/svg"
          width="1em"
          height="1em"
          viewBox="0 0 24 24"
          v-if="darkMode.state"
        >
          <path
            fill="currentColor"
            d="M11 19H8a1 1 0 0 0 0 2h3a1 1 0 0 0 0-2m9-4h-1.16A8.2 8.2 0 0 0 20 12.05a1 1 0 0 0-.34-.93a1 1 0 0 0-1-.19a6 6 0 0 1-1.92.32a6.06 6.06 0 0 1-6.06-6a7 7 0 0 1 .1-1a1 1 0 0 0-.35-.92a1 1 0 0 0-1-.18A8.06 8.06 0 0 0 4 10.68A8 8 0 0 0 5.27 15H4a1 1 0 0 0 0 2h16a1 1 0 0 0 0-2m-3.72 0H7.83a6 6 0 0 1 .88-9.36a8.06 8.06 0 0 0 8.05 7.61a7 7 0 0 0 .79 0A6.1 6.1 0 0 1 16.28 15M16 19h-1a1 1 0 0 0 0 2h1a1 1 0 0 0 0-2"
          />
        </svg>
        <svg
          xmlns="http://www.w3.org/2000/svg"
          width="1em"
          height="1em"
          viewBox="0 0 24 24"
          v-else
        >
          <path
            fill="currentColor"
            d="M17.66 8.34a1 1 0 0 0 .7-.29l.71-.71a1 1 0 1 0-1.41-1.41l-.66.71a1 1 0 0 0 0 1.41a1 1 0 0 0 .66.29M12 6a1 1 0 0 0 1-1V4a1 1 0 0 0-2 0v1a1 1 0 0 0 1 1m-8 6H3a1 1 0 0 0 0 2h1a1 1 0 0 0 0-2m1.64-3.95a1 1 0 0 0 .7.29a1 1 0 0 0 .71-.29a1 1 0 0 0 0-1.41l-.71-.71a1 1 0 0 0-1.41 1.41ZM21 12h-1a1 1 0 0 0 0 2h1a1 1 0 0 0 0-2m-10 7H8a1 1 0 0 0 0 2h3a1 1 0 0 0 0-2m7-4h-.88a5.4 5.4 0 0 0 .38-2a5.5 5.5 0 0 0-11 0a5.4 5.4 0 0 0 .38 2H6a1 1 0 0 0 0 2h12a1 1 0 0 0 0-2m-3.15 0h-5.7a3.44 3.44 0 0 1-.65-2a3.5 3.5 0 0 1 7 0a3.44 3.44 0 0 1-.65 2M16 19h-1a1 1 0 0 0 0 2h1a1 1 0 0 0 0-2"
          />
        </svg>
      </div>
    </div>
  </nav>
</template>先讲一下结构变化。之前我们直接把 <a> 和切换黑暗模式的按钮放在 <nav> 下,当只有两个子元素时是能使其分布在两端的,但是若子元素数量大于两个,则元素会从左到右依次排列。所以在第 7 行和第 14 行,我们把 <nav> 分为两个部分,作为导航栏左侧和右侧的区域,实现两端对齐的效果。
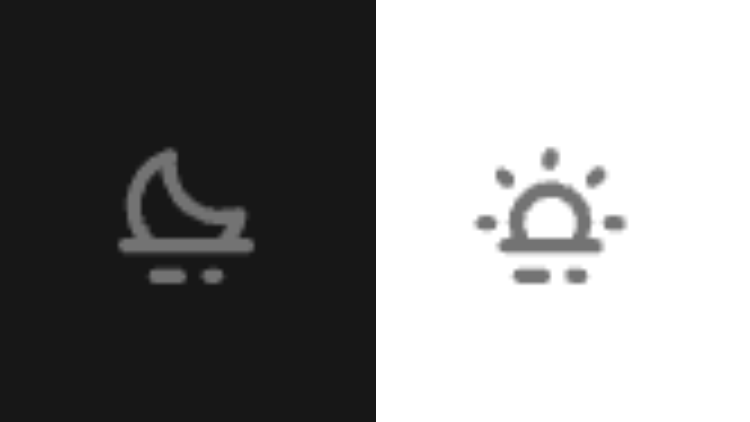
在导航栏右侧区域中,加入了一个跳转至 GitHub 仓库的按钮(第 15 行),读者可以将 href 属性修改为自己的仓库地址。在第 40 行,我们实现了切换黑暗模式的按钮,并监听按钮的点击事件来切换 darkMode 的状态。我们在 <svg> 元素上使用 v-if / v-else 指令,根据 darkMode 的状态来决定显示哪个图标。
现在我们的按钮在黑暗模式下将显示为一个月亮,在非黑暗模式下则将显示为一个太阳。
细心的人可能会发现,如果此时切换用户偏好模式,也就是系统的深色 / 浅色模式,确实会切换网站的黑暗模式,但是按钮的图标并不会随之改变。这是因为我们并没有监听系统的模式变化,所以我们需要在 onMounted 钩子中监听 matchMedia 的变化,并在变化时触发响应式状态更新:
<script setup lang="ts">
// ...

onMounted(() => {
  window.matchMedia("(prefers-color-scheme: dark)").addEventListener("change", () => {
    triggerRef(darkMode);
  });
});
</script>

<template>
<!-- ... -->
</template>
好了,现在解决了。